
The deltaDNA platform lets you send push notification messages to users.
This topic explains how to enable push notifications for iOS devices.
Prerequisites
- Your game is set up to receive events on the deltaDNA platform
- You have integrated the deltaDNA Unity SDK into your application
- You have an Apple iOS developer account and Xcode
Enabling push notifications for iOS
- Register with Apple for a certificate please follow this tutorial https://docs.deltadna.com/advanced-integration/ios-sdk/apple-certificates/
- Go to Setup > Manage Identity
- Upload your certificate to DeltaDNA
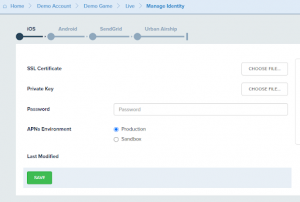
- Upload your certificate to DeltaDNA
- Configure notifications
- Regular Push Notifications
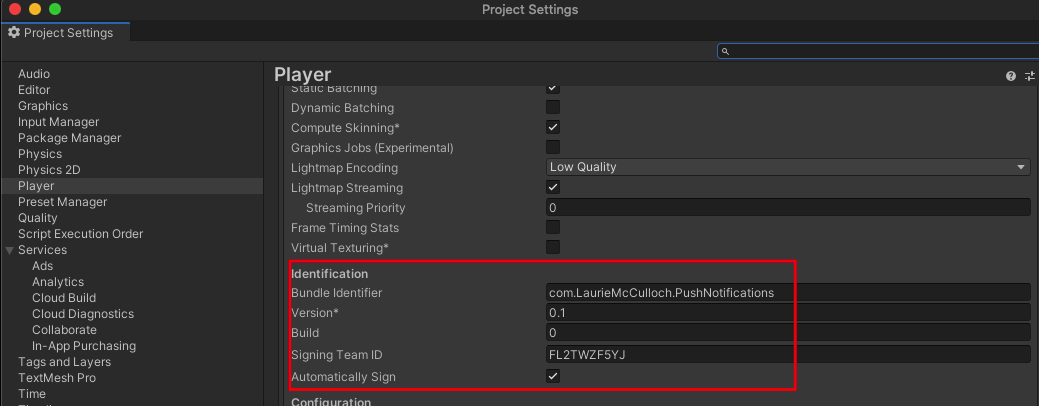
- Enter your “Bundle Identifier” and “Signing Team ID” to the IOS settings section of the Project Settings > Player. These values can be retrieved from the Apple Developer Console. You will also need to download the Certificate file and double click on it to add it to your local keyfile.
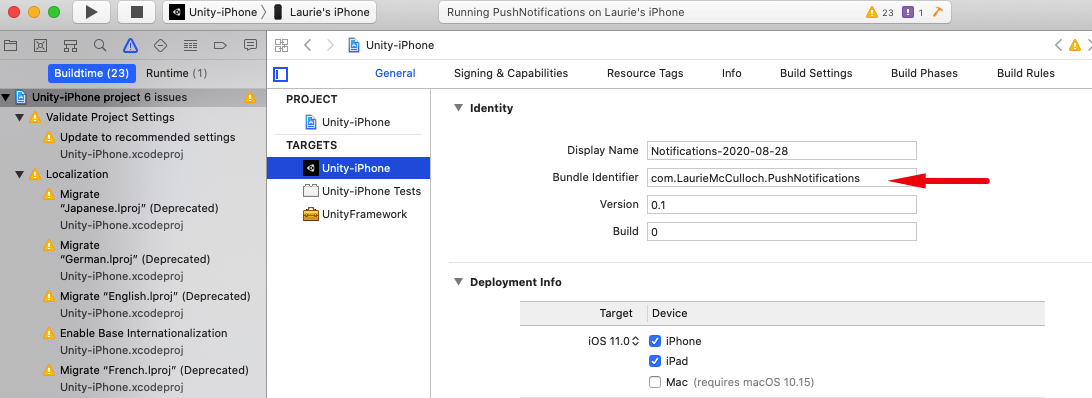
- On the Build Settings page, choose the Debug build option. Then “Build and Run”.
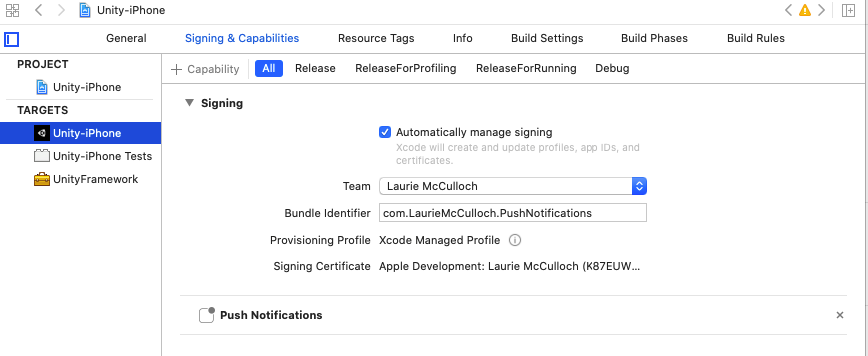
- The build process will launch Xcode and attempt to run your game. It may fail at this stage if you don’t have a device connected or any of your Signing and Capabilities options set correctly. The settings used in this example are as follows. NOTE: Identity- Note this matches the value entered into the Bundle Identifier in Unity
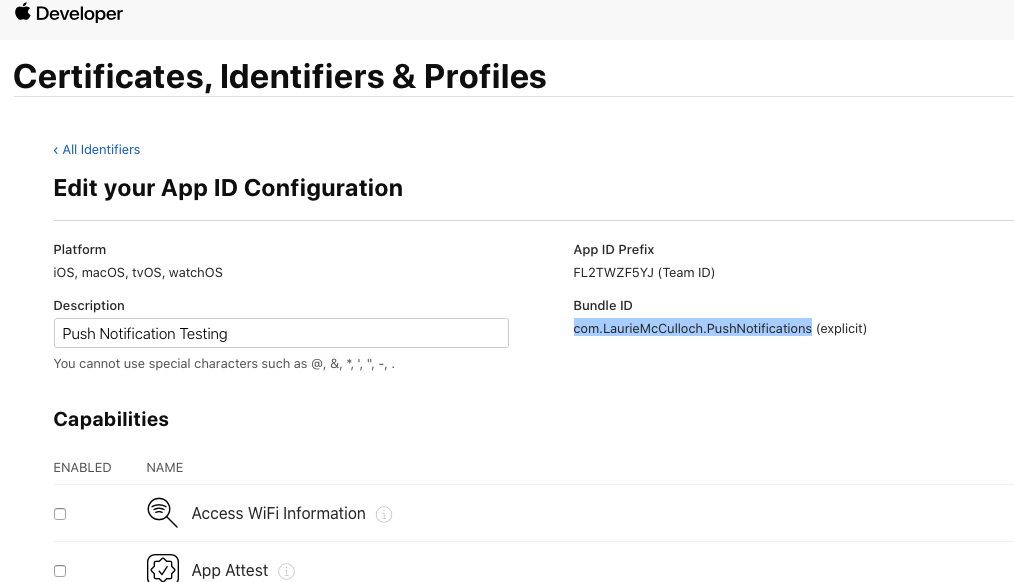
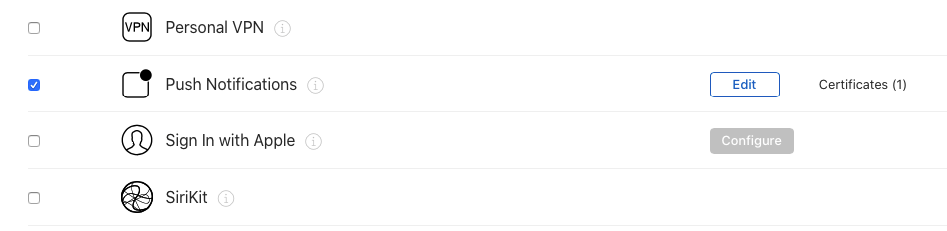
- Enable the push notification in the apple developer console
- Signing – There aren’t any errors in the Signing & Capabilities page and the Push Notification Capability is displayed. Note, you may need to check and modify the settings on this page if you belong to multiple teams or if the bundle identifier or provisioning profile don’t match those specified in the Apple developer console.
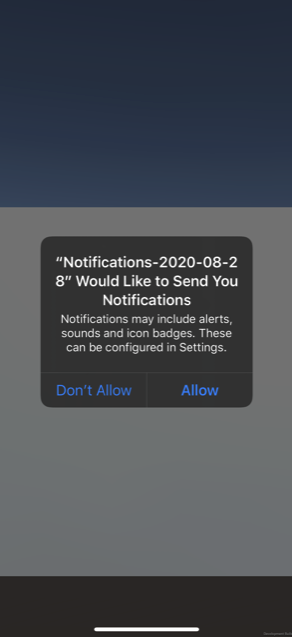
- Accept permission for notifications
- The Xcode debug window contains logging to indicate that a “PushNotificationToken” was received and a notificationServices event is sent automatically by the SDK to inform deltaDNA that permission has been granted and the pushNotificationToken received
1234[DDSDK] [INFO] Did register for iOS push notifications:DeltaDNA.IosNotifications:DidRegisterForPushNotifications(String)Got an iOS push token: e430b2a2ac7e6bb64ecaeebc810d0d036a90c7395fd564502f201fee3e478414 - The player’s userID is also revealed a little higher up in the same logs.
1[DDSDK] [INFO] Starting DDNA SDK with new user f6de8ee0-0669-4887-85cd-bedd4c9972de - You can now continue to step 4
- Enter your “Bundle Identifier” and “Signing Team ID” to the IOS settings section of the Project Settings > Player. These values can be retrieved from the Apple Developer Console. You will also need to download the Certificate file and double click on it to add it to your local keyfile.
- Rich Push Notifications
- Please refer to Regular Push Notifications above then proceed to step 2
- Enable Rich Push Notifications from the deltaDNA configuration panel in Unity, then apply the changes and rebuild the application.

Note: If you are using Unity Editor 2018.4 – 2019.2 you will need to modify the Xcode build settings to use the Legacy Build System.
- Regular Push Notifications
- In the script file where you’ve implemented the ‘StartSDK’ method, enter this line of code after your ‘StartSDK’ method:
DDNA.Instance.IosNotifications.RegisterForPushNotifications();
The event browser now displays the notificationServices event.
Once the pushNotificationToken has connected to the userID, check that push notifications are working successfully.
Testing push notifications
To check if push notifications are working correctly:
- Go to Setup > Message Test Tool.
- Set the Notification type to iOS.
- In the pushNotificationToken field, select the Lookup button.
- Enter the userID. This automatically brings up the Google Registration ID.
- You could alternatively paste your pushNotificationToken
- Create a MessageID,In the Message Body field, enter a message to send to the device.
- [OPTIONAL] Use the Title, SubTitle and Image fields when constructing an IOS Rich notification. The image type should be a JPG, GIF or Animated GIF. (Note, png images will not be displayed on an IOS notification)
- Select Submit.
If notifications are correctly set up, you will receive a notification with the message you entered previously.

