
Campaigns
Event-triggered campaigns can be created, viewed and edited on the campaign management page.
Before creating the campaign, you’ll need to create at least one campaign action and any player segments that you wish to target with this campaign.
You can configure sequences of actions, a conversion event, and looping campaigns.
Creating an event-triggered campaign
Click the Create Campaign button on the campaign management page, select the type of campaign you would like to create, and you’ll be brought to the campaign creation wizard.
The campaign creation wizard guides you through the steps needed to launch a campaign. To navigate between pages, click Next or use the breadcrumbs on the page. To save your progress, click Save. You can save partially completed campaigns and return to them later. To start your campaign, click on the Publish button on the Confirmation page.
The campaign creation wizard contains the following pages:
- Details
- Players
- Trigger
- Action
- Conversion
- Confirmation
Details
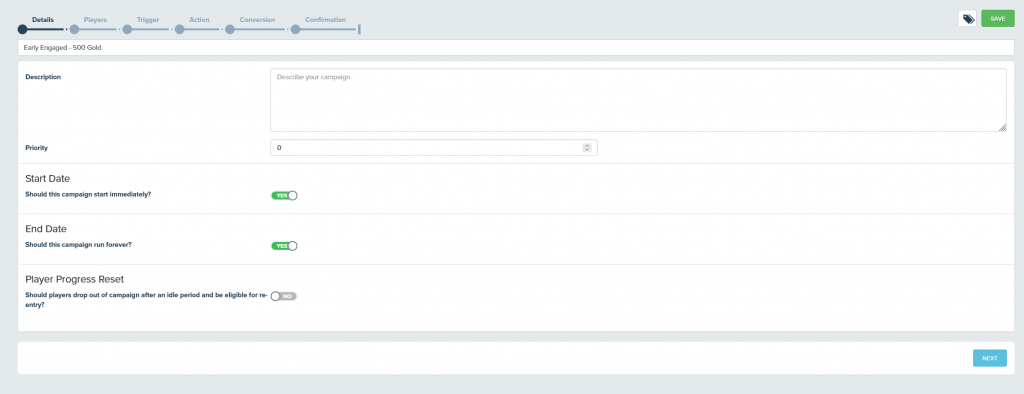
Give your campaign a name and description on the Details page. The name is displayed in the campaign list and on any reports.
Set the campaign priority to determine which campaign to use if the player qualifies for more than one active campaign on the same event trigger. Higher numbers take priority over lower ones.
Set the start date and end date if you want your campaign to run at a particular time. By default, the campaign starts immediately and runs until you pause or delete it.
The player progress reset control lets players become eligible for the campaign again in future, even if they’ve already converted on this campaign.
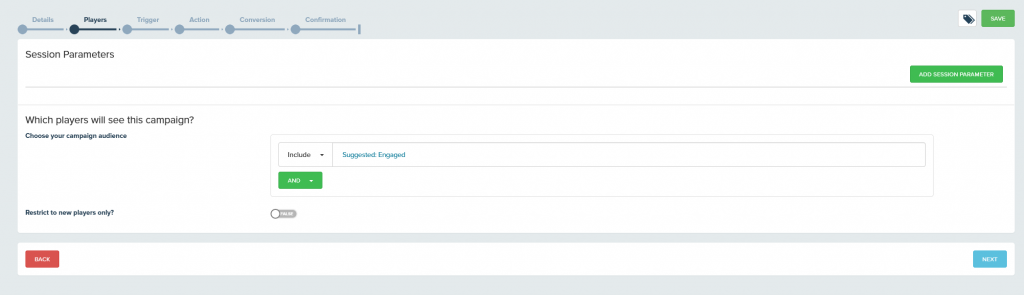
Players
In the Players page, select which player segments are eligible for the campaign. The campaign logic and content is downloaded to all players in the segment at the start of each gameplay session.
In the Players page, select which player segments are eligible for the campaign. The campaign logic and content is downloaded to all players in the segment at the start of each gameplay session.
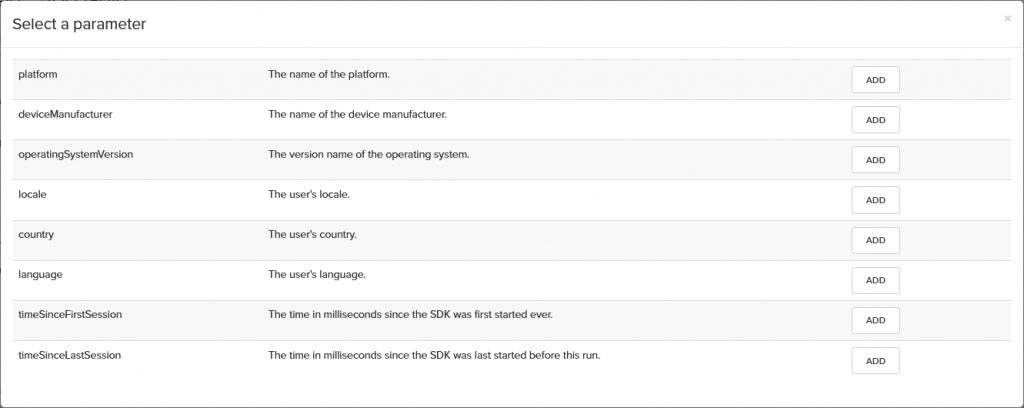
To further refine the player selection, add session parameter criteria. Session parameters are additional details that the SDK reveals about itself at the start of each session.
You can also restrict the campaign to “New Players” that start playing on or after the start date of the campaign.
Trigger
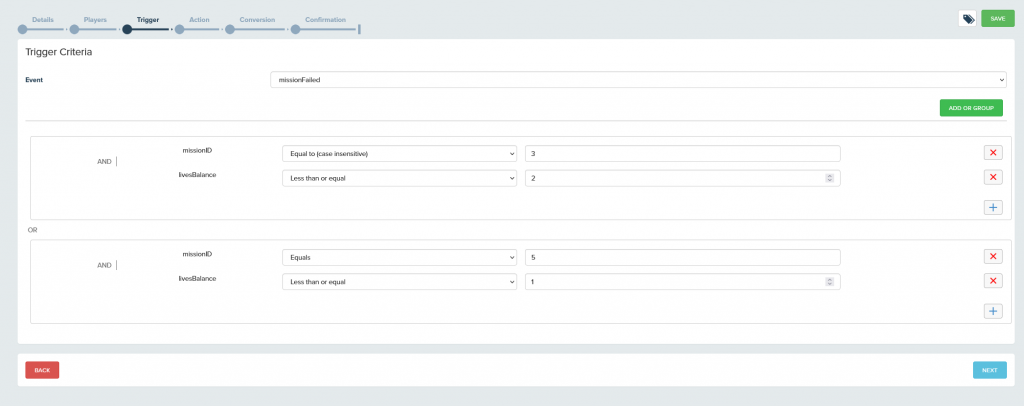
The Trigger page lets you select which event and parameters trigger the campaign content on the players device. The user must meet the specified criteria to trigger the campaign content. For each criteria block you can add multiple parameter conditions that must all be met. You can also add multiple criteria blocks with OR statements between them.
Action
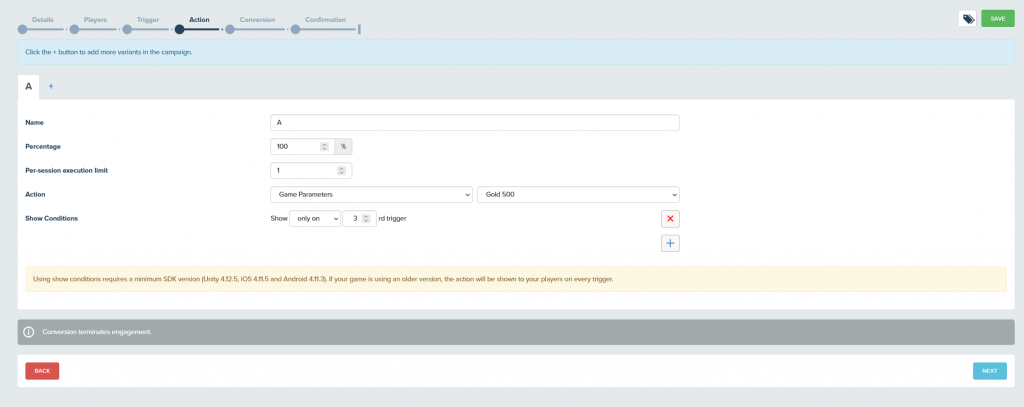
Event-triggered campaigns also support A/B Testing. You can add multiple variant groups and specify different actions for each. By default the platform tries to make each of the variants the same size. You can customize the variant size, but all variants must add up to 100%
The per-session execution limit field defines the number of times a player can see the action in a single session if they trigger the campaign multiple times.
By default, an event trigger only results in one content action being delivered to the player, even if you have multiple campaigns running on the same event trigger.
To send multiple Game Parameter actions to the player simultaneously, you can override this behavior. This is useful if you want to experiment with different game configuration combinations on launch, or different loadout combinations at the start of a mission.
To enable multi-parameter capabilities, set the following SDK setting in your code:
Unity:
|
1 |
DDNA.Instance.Settings.MultipleActionsForEventTriggerEnabled = true; |
Android:
|
1 |
DDNA.instance().getSettings().setMultipleActionsForEventTriggerEnabled(true); |
Show Conditions
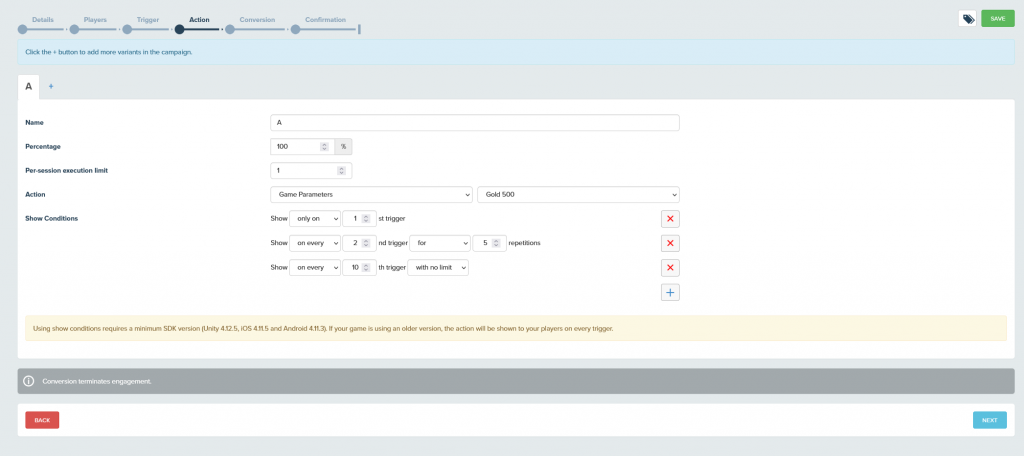
Set the show conditions to limit the frequency at which the action triggers when the user records the specified event. You can set the actions to be triggered at a timed interval, or on specific numeric occurrences of the event.
For example, you can set the action to trigger on the 1st time the specified event is recorded, and on every 5th activation. When setting conditions to show the campaign only on every Nth trigger, you can also restrict the total number of executions for this action. The example above will trigger a display of the image message to the user on the 1st, 2nd, 4th, 6th, 8th, 10th event, and subsequently every 10th time the user hits the event.
You can apply as few or as many Show Conditions as you like. By default, the action is triggered on every valid recorded event.
Conversion
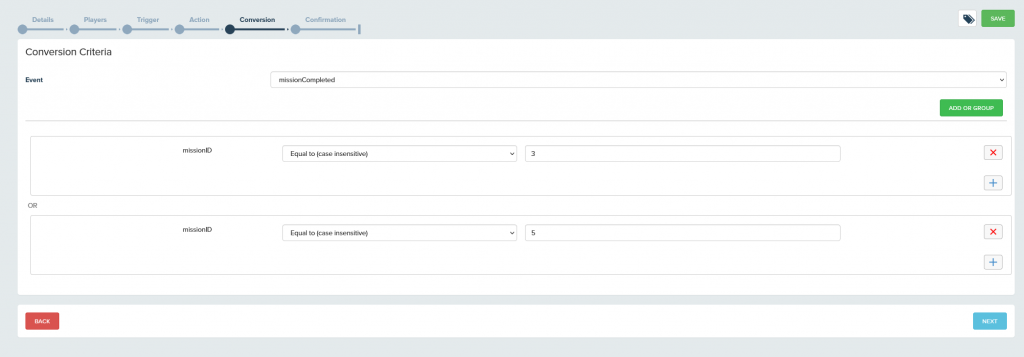
Select the event and any additional parameter criteria that you want to use to measure conversion on this campaign.
When the player completes the desired action, they’re classed as converted and are no longer eligible for the campaign, unless you’ve enabled the player progress reset option on the Details page.
Confirmation
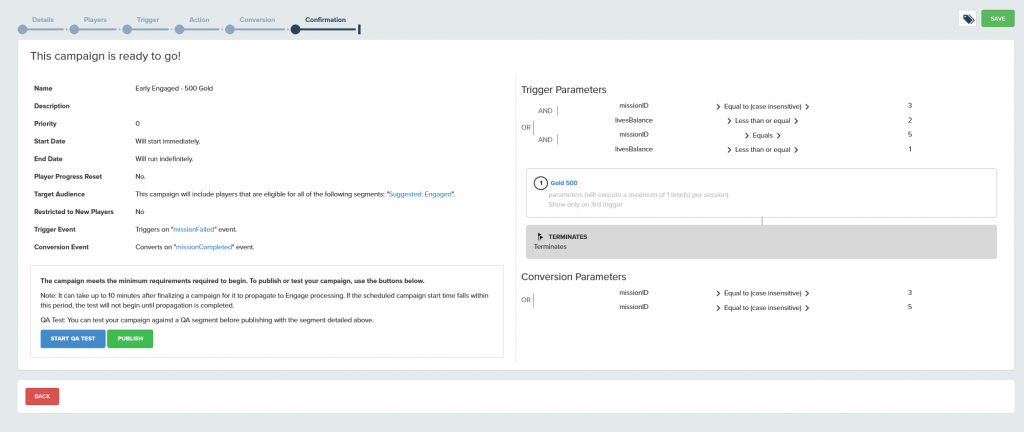
The Confirmation page displays the campaign so you can check the details before starting it. You can save your campaign and return to it when you’re ready to begin.
There are two modes you can use to start a campaign.
- Start QA Test lets you select a segment with the Test Segment flag set to run the campaign immediately for your test devices.
- Publish begins the campaign immediately, or as scheduled.
Usage
The configuration for all eligible campaigns, based on player segments, is downloaded to the player’s device at the start of each session. This means that any new campaigns or modifications to existing campaigns are only picked up when the player’s next session begins.
To edit campaign details after it has launched, select Edit in the Campaign Management page. You can also Duplicate the campaign to create a new one based on it.
To debug campaigns a player is eligible for, enter their userID in SETUP > TOOLS – ENGAGE > Config Trace Tool. This displays a list of all event-triggered campaigns they’re currently eligible for and all the other configuration data that’ll be passed to the SDK at the start of a session.
Reporting
The deltaDNA SDK records a ddnaEventTriggeredAction event each time a player triggers an action. The event contains details on the campaign, player variant, action name, and type. You can use this event in the Slice & Dice and Data Mining tools to perform analysis and build reports that you can publish to custom dashboards. You can also use the event in segmentation and player selection for other campaigns.
The Campaign Details page displays a Campaign Reporting section for event-triggered campaigns, which displays data for live campaigns. To access the Campaign Details page, select the campaign name in the Campaign Management page.
Select the event and any additional criteria that you want a report of. For example, you might want to view your conversion event. To run the report click Apply.

